Build easily and quickly your own HUGO website on macOS and host it for free on GitHub pages.
Hugo is an open-source website generator for static websites. Often, for a small website, you do not need a complex infrastructure with a front-end, back-end, and database (e.g., WordPress).
In this article, I’ll take you through how I installed Hugo on macOS and published it for free on GitHub. Want to know more about Hugo and other installation options? Then visit https://gohugo.io/installation/. In addition to installing Hugo, I will also tell you how to install the Hugo Theme Stack by Jimmy Cai.
Let’s Go
Installing Hugo on macOS is done with Homebrew. This is a package manager for MacOS or Linux. Want to know more about Homebrew? Visit https://brew.sh/
STEP 1: Create two GitHub repositories.
Go to your GitHub account and create two repositories there. If you don’t have an account on GitHub yet, make one on GitHub.com.
Create 1st Repository
- Right at the top of GitHub, click on your profile image.
- Go to “Your repositories”
- Click on “New”.
- Create your first repository and name it. Make your repository “Public”. You do not need a “README file”.
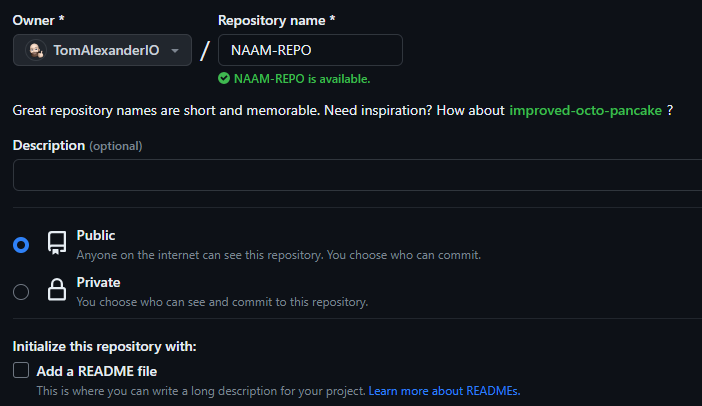 This first repository will contain all your Hugo files to maintain the website.
 - Click “Create repository”.
Create 2nd Repository
- Right at the top of GitHub, click on your profile image.
- Go to “Your repositories”
- Click on “New”.
- The repository name is essential here. Type here your GitHub URL. This is your nickname plus “.github.io” (nickname.github.io). Make this repository “Public” as well. Here, you do need a “README file”.
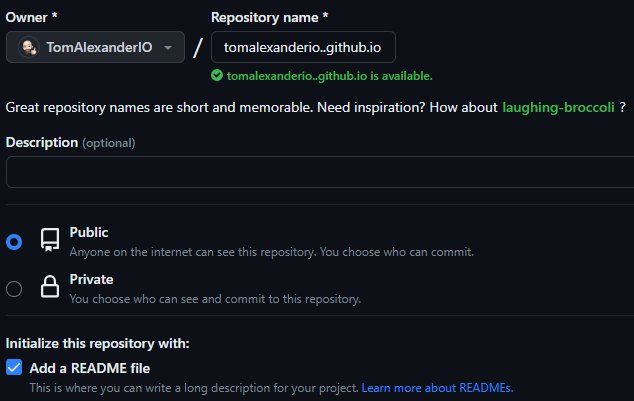 This second repository will soon contain your static website files.
 - Click “Create repository”.
STEP 2: Open your Terminal on your Mac.
For the installation, we will use your Terminal on your Mac. You open it in the following way.
Open Terminal
- Open the spotlight with “Command + spacebar” on your Mac keyboard or click on the magnifying glass in the upper right corner.
- In Spotlight, type “Terminal.”
- When you see “Terminal” in the search results, open it.
STEP 3: Install Xcode
Xcode is a development environment (IDE) for developing software applications for iOS, iPadOS, macOS, WatchOS, tvOS, and above. It contains tools that allow developers to write, debug, and test software and tools for managing project files and resources. We need these to install Homebrew properly. So install this if you don’t already have it.
Install Xcode
-
You install Xcode with the following command in your Terminal.
1xcode-select --install -
Confirm that you want to install “Xcode”
-
Agree to a license agreement and wait for the installation process to complete. This can sometimes take a while.
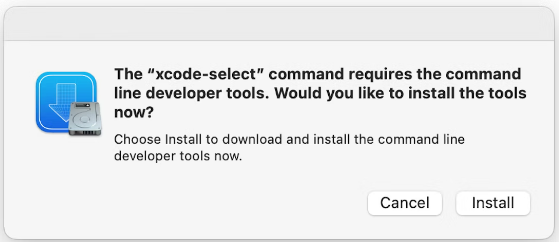
STEP 4: Installing Homebrew
Installing Homebrew is done with one command and that is the command below. Copy this command and paste it into your “Terminal” and press “Enter”.
|
|
STEP 5: Installing Hugo
Installing Hugo is incredibly easy and also done with one command.
|
|
STEP 6: Create Hugo site
-
Create your Hugo website. Modify
to the name of your website. 1hugo new site <sitename> -
Go to the website directory.
1cd <sitenaam> -
Turn your website into a repository.
1git init -
Add the files.
1git add . -
Confirm the files.
1git commit -m "Add hugo site"
Between the brackets put a description as desired, e.g. “Add Hugo site”.
-
Make sure you are on the “Main” branch.
1git branch -M main -
Now link your first GitHub repository, (which you created earlier) to this repository.
1git remote add origin https://github.com/<NickNaam>/<RepositoryNaam>.git -
Now push your repository to GitHub.
1git push -u origin main
Now all your files have been added to the first repository you created on Github. this may take a while but if you refresh it now you will see the files on Github.
STEP 7: Install Hugo Theme Stack
Now we are going to install the theme “Stack” from CaiJimmy. Do you want to know everything about this theme and alternative installation methods? Please visit https://stack.jimmycai.com/. I will install the theme through a submodule.
-
Install the theme in your Hugo website
1git submodule add https://github.com/CaiJimmy/hugo-theme-stack/ themes/hugo-theme-stack -
Now open your local website folder in an application such as Visual Studio Code. The folder can be found at the following path: MacHD/Users/username/websitename
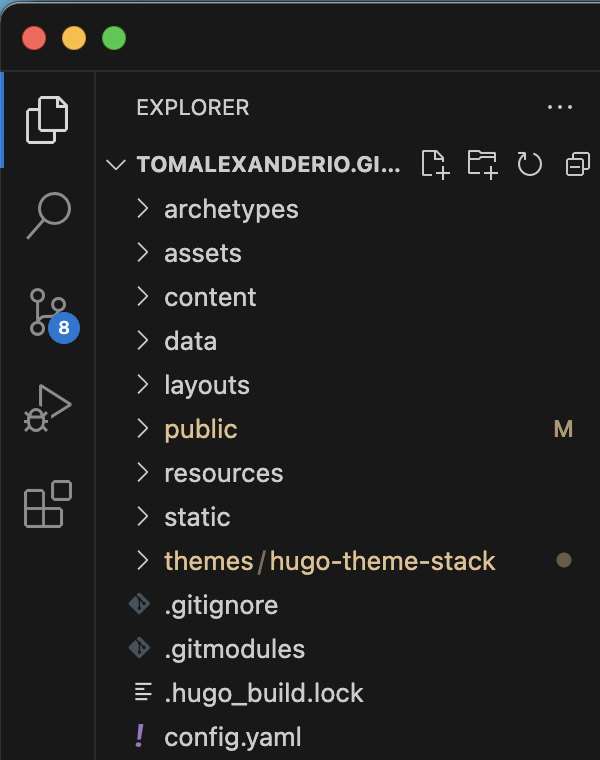
-
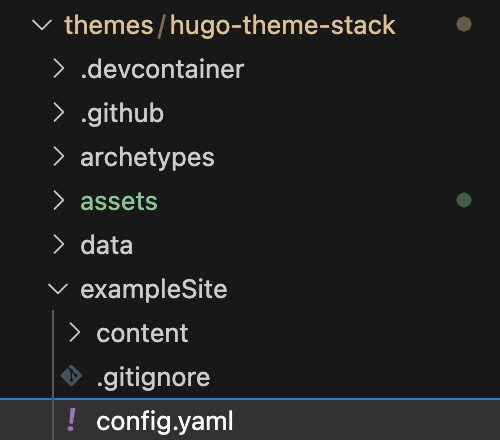
Now copy from the theme folder the sample file “config.yaml” and paste it into the root folder. This file can be found in the folder: themes/exampleSite/config.yaml
-
Delete the file “config.toml” from the root folder.
-
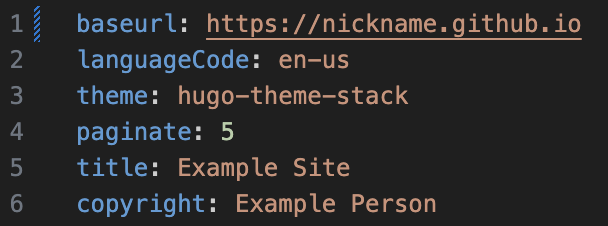
In the file “config.yaml”, modify the “baseURL” to your GitHub url of your second repository.
-
Go back to your Terminal and view your Web site with a local Web server using the following command.
1hugo server -D -
You can now view your website locally at the address http://localhost:1313/
-
Stop the local web server again with key combination “Ctrl+C”.
STEP 8: Put your website live on GitHub pages.
Now go put your website live on GitHub pages. Do this by pushing your website to your second repository you created earlier.
-
First, add your second GitHub repository to your Hugo website by adding a two submodule in the “Public” folder.
1git submodule add https://github.com/<NickNaam>/<RepositoryNaam>.git publicNote that your repository name of your second GitHub repository should be the URL of your GitHub pages.
-
Now create your static website files.
1hugo -t hugo-theme-stack -
Go to the “Public” folder.
1cd public -
Add the files.
1git add . -
Confirm the files.
1git commit -m "First upload" -
Now push your website to GitHub.
1git push
If all went well, all your files have now been pushed to your GitHub. These are now automatically deployed to your GitHub pages. Your site is now live and can be accessed at your GitHub URL. It may take a while for your website to deploy on GitHub.
You can now continue editing your website and create your first blog if you haven’t already. In the theme folder “exampleSite” under the folder “content” you will find some example blogs. If you would like to learn more about customizing the theme or the Hugo site? Please visit https://stack.jimmycai.com/ or https://gohugo.io/
You are always free to contact me. You can reach me at LinkedIn or you can send me an email, hello@tomalexander.io.
